Tuesday, February 10, 2015
How to Make a Calculator App for Android
Hello everyone, in this tutorial we are going to learn how to make a calculator app for android (using Eclipse). Step by step process as well as a detailed video tutorial added in this article that will help you to make a simple calculator in very easy way. You can also download the apk file and use it as a normal app in your android phone.
Also Read: The Top 4 Websites to Create Android Apps Online for Free
Also Read: The Top 4 Websites to Create Android Apps Online for Free
Steps to Make a Calculator App for Android
1. First of all open eclipse (If your are new to android programming then go to http://developer.android.com/sdk/installing/installing-adt.html to download and configure android development tools).
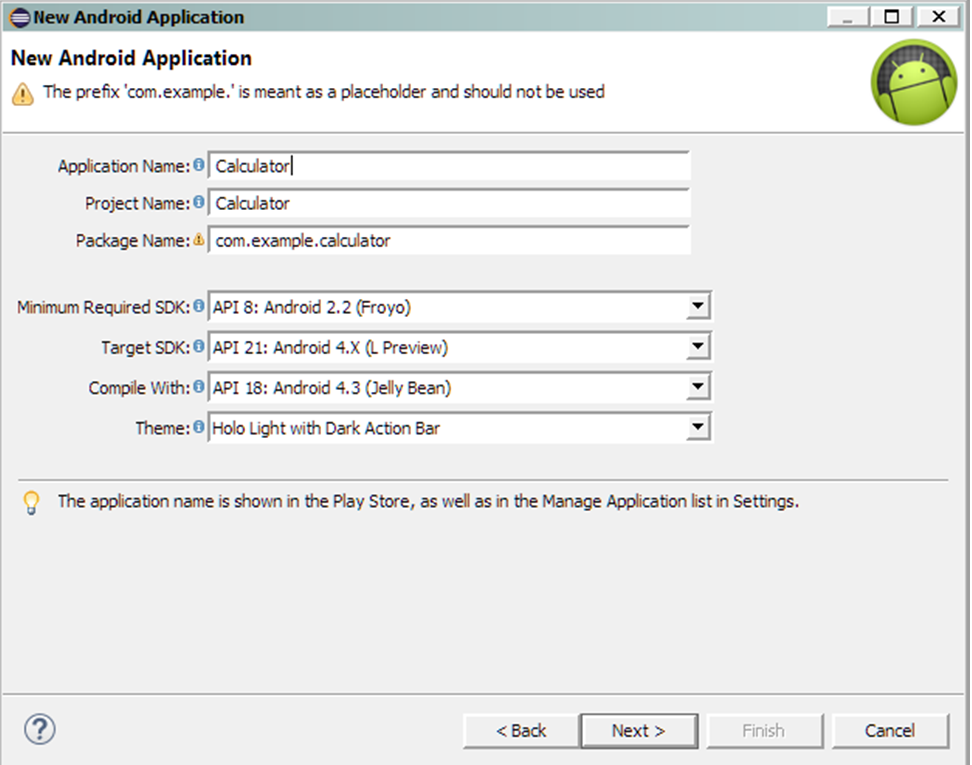
2. Create a new project > Select Android Application Project > Now name your project "Calc".


3. Choose a Package Name. A Package Name is a unique URL of your Application. In most cases it is the inverse of your website.
For example: com.thecrazyprogrammer.appname
4. If you want you can leave it to the default package name which is "com.example.calc". Now hit next two times.


5. If you have made an Icon then add it otherwise go with the default one. Select Blank Activity > Now name your activity "GUI".


6. From Palette option add total 16 buttons & name them from 0 to 9 and +, -, X, /, ., =.


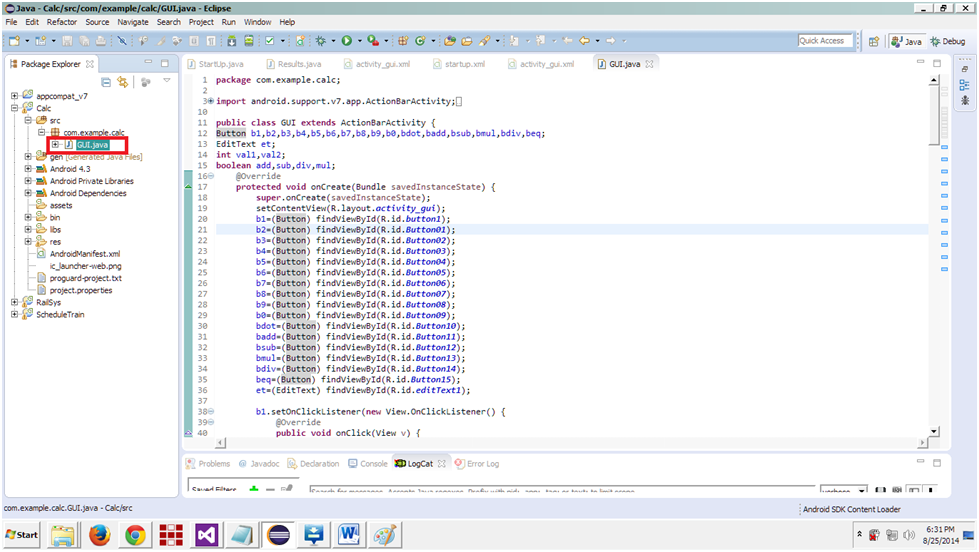
7. After completing this go to Package Explorer & under your Package Explorer Select src > Your package Name > yourActivityName.java


Also Read: C4droid: Download C/C++ Compiler for Android Platform for Free
8. Open the java file and paste the given code:
10. Download the calculator app for android from below link.
packagecom.example.calc;

import android.support.v7.app.ActionBarActivity;
importandroid.os.Bundle;
importandroid.view.Menu;
importandroid.view.MenuItem;
importandroid.view.View;
importandroid.widget.Button;
importandroid.widget.EditText;

public class GUI extends ActionBarActivity {
Button b1,b2,b3,b4,b5,b6,b7,b8,b9,b0,bdot,badd,bsub,bmul,bdiv,beq;
EditTextet;
int val1,val2;
booleanadd,sub,div,mul;
 @Override
 protected void onCreate(Bundle savedInstanceState) {
  super.onCreate(savedInstanceState);
  setContentView(R.layout.activity_gui);
  b1=(Button) findViewById(R.id.button1);
  b2=(Button) findViewById(R.id.Button01);
  b3=(Button) findViewById(R.id.Button02);
  b4=(Button) findViewById(R.id.Button03);
  b5=(Button) findViewById(R.id.Button04);
  b6=(Button) findViewById(R.id.Button05);
  b7=(Button) findViewById(R.id.Button06);
  b8=(Button) findViewById(R.id.Button07);
  b9=(Button) findViewById(R.id.Button08);
  b0=(Button) findViewById(R.id.Button09);
  bdot=(Button) findViewById(R.id.Button10);
  badd=(Button) findViewById(R.id.Button11);
  bsub=(Button) findViewById(R.id.Button12);
  bmul=(Button) findViewById(R.id.Button13);
  bdiv=(Button) findViewById(R.id.Button14);
  beq=(Button) findViewById(R.id.Button15);
  et=(EditText) findViewById(R.id.editText1);

  b1.setOnClickListener(new View.OnClickListener() {
   @Override
   public void onClick(View v) {
    // TODO Auto-generated method stub
    et.setText(et.getText()+"1");
   }
  });
  b2.setOnClickListener(new View.OnClickListener() {
   @Override
   public void onClick(View v) {
    // TODO Auto-generated method stub
    et.setText(et.getText()+"2");
   }
  });
  b3.setOnClickListener(new View.OnClickListener() {
   @Override
   public void onClick(View v) {
    // TODO Auto-generated method stub
    et.setText(et.getText()+"3");
   }
  });
  b4.setOnClickListener(new View.OnClickListener() {
   @Override
   public void onClick(View v) {
    // TODO Auto-generated method stub
    et.setText(et.getText()+"4");
   }
  });
  b5.setOnClickListener(new View.OnClickListener() {
   @Override
   public void onClick(View v) {
    // TODO Auto-generated method stub
    et.setText(et.getText()+"5");
   }
  });
  b6.setOnClickListener(new View.OnClickListener() {
   @Override
   public void onClick(View v) {
    // TODO Auto-generated method stub
    et.setText(et.getText()+"6");
   }
  });
  b7.setOnClickListener(new View.OnClickListener() {
   @Override
   public void onClick(View v) {
    // TODO Auto-generated method stub
    et.setText(et.getText()+"7");
   }
  });
  b8.setOnClickListener(new View.OnClickListener() {
   @Override
   public void onClick(View v) {
    // TODO Auto-generated method stub
    et.setText(et.getText()+"8");
   }
  });
  b9.setOnClickListener(new View.OnClickListener() {
   @Override
   public void onClick(View v) {
    // TODO Auto-generated method stub
    et.setText(et.getText()+"9");
   }
  });
  b0.setOnClickListener(new View.OnClickListener() {
   @Override
   public void onClick(View v) {
    // TODO Auto-generated method stub
    et.setText(et.getText()+"0");
   }
  });
  bdot.setOnClickListener(new View.OnClickListener() {
   @Override
   public void onClick(View v) {
    // TODO Auto-generated method stub
    et.setText(et.getText()+".");
   }
  });

 badd.setOnClickListener(new View.OnClickListener() {

  @Override
  public void onClick(View v) {
   val1=Integer.parseInt(et.getText()+"");
   add=true;
   et.setText(null);
  }
 });
bsub.setOnClickListener(new View.OnClickListener() {

  @Override
  public void onClick(View v) {
   val1=Integer.parseInt(et.getText()+"");
   sub=true;
   et.setText(null);
  }
 });
bdiv.setOnClickListener(new View.OnClickListener() {

 @Override
 public void onClick(View v) {
  val1=Integer.parseInt(et.getText()+"");
  div=true;
  et.setText(null);
 }
});
bmul.setOnClickListener(new View.OnClickListener() {

 @Override
 public void onClick(View v) {
  val1=Integer.parseInt(et.getText()+"");
  mul=true;
  et.setText(null);
 }
});

beq.setOnClickListener(new View.OnClickListener() {

 @Override
 public void onClick(View v) {
  val2=Integer.parseInt(et.getText()+"");
  if (add==true) {
   et.setText(val1+val2+"");
   add=false;
  }
  if (sub==true) {
   et.setText(val1-val2+"");
   sub=false;
  }
  if (mul==true) {
   et.setText(val1*val2+"");
   mul=false;
  }
  if (div==true) {
   et.setText(val1/val2+"");
   div=false;
  }
 }

});


 }

 @Override
 publicbooleanonCreateOptionsMenu(Menu menu) {
  // Inflate the menu; this adds items to the action bar if it is present.
  getMenuInflater().inflate(R.menu.gui, menu);
  return true;
 }

 @Override
 publicbooleanonOptionsItemSelected(MenuItem item) {
  // Handle action bar item clicks here. The action bar will
  // automatically handle clicks on the Home/Up button, so long
  // as you specify a parent activity in AndroidManifest.xml.
  int id = item.getItemId();
  if (id == R.id.action_settings) {
   return true;
  }
  returnsuper.onOptionsItemSelected(item);
 }
}
9. Right click on your project and select run as Android Application .
Now the emulator will pop up & you can test your project.


10. Download the calculator app for android from below link.
Calculator.apk
Subscribe to:
Post Comments (Atom)
No comments:
Post a Comment
Note: Only a member of this blog may post a comment.