Showing posts with label android. Show all posts
Showing posts with label android. Show all posts
Thursday, February 26, 2015
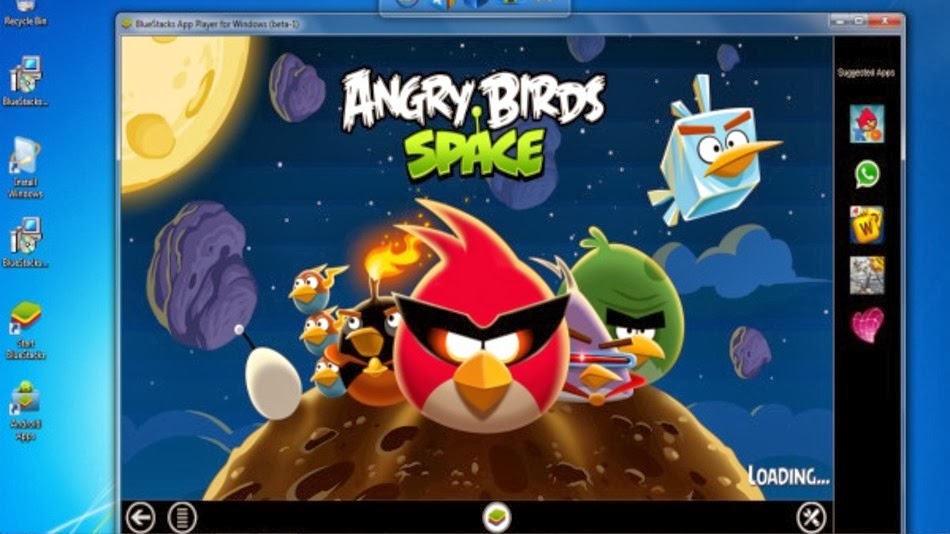
Run Android Apps on PC Free
 |
| Enjoy Android Apps on PC with Bluestack |
How to Run Android Apps on PC?
Now a days smart phones become basic need of a social human. There are very interesting stuff in smart phones like addictive apps and games. Specially Android platform provide a lot of apps and games that are very addictive. The first apps to go viral at an unprecedented pace were the apps with calling and texting, which are capable of reducing the burden on your wallet by helping you stay in touch with your dear ones. Such apps are rightly called “Over The Top” or OTT apps, some examples are We Chat, WhatsApp, Viber, Line, Rebtel etc. The important differences in these apps are that only a few of these apps help you make phone calls (Rebtel and Viber), the others are only text messaging based. So many people want to try Android Apps on their PC so i got this solution for them. Follow this easy tutorial and enjoy Android Apps on your Pc.
Steps to Get Android Games/Apps on your PC:
- First of All Download the Android Emulator from the link below.
- Click Here to Download Bluestacks.
- Youwave is a good emulator too, but it won’t work with ARM based apps.
- Install Bluestacks and run it. Note: You might run into graphics errors during installation,But still you can find out the solutions to almost most of the Bluestacks errors here.
- On the home page of Bluestacks, click on the search button and type in the name of the app or the game you want.
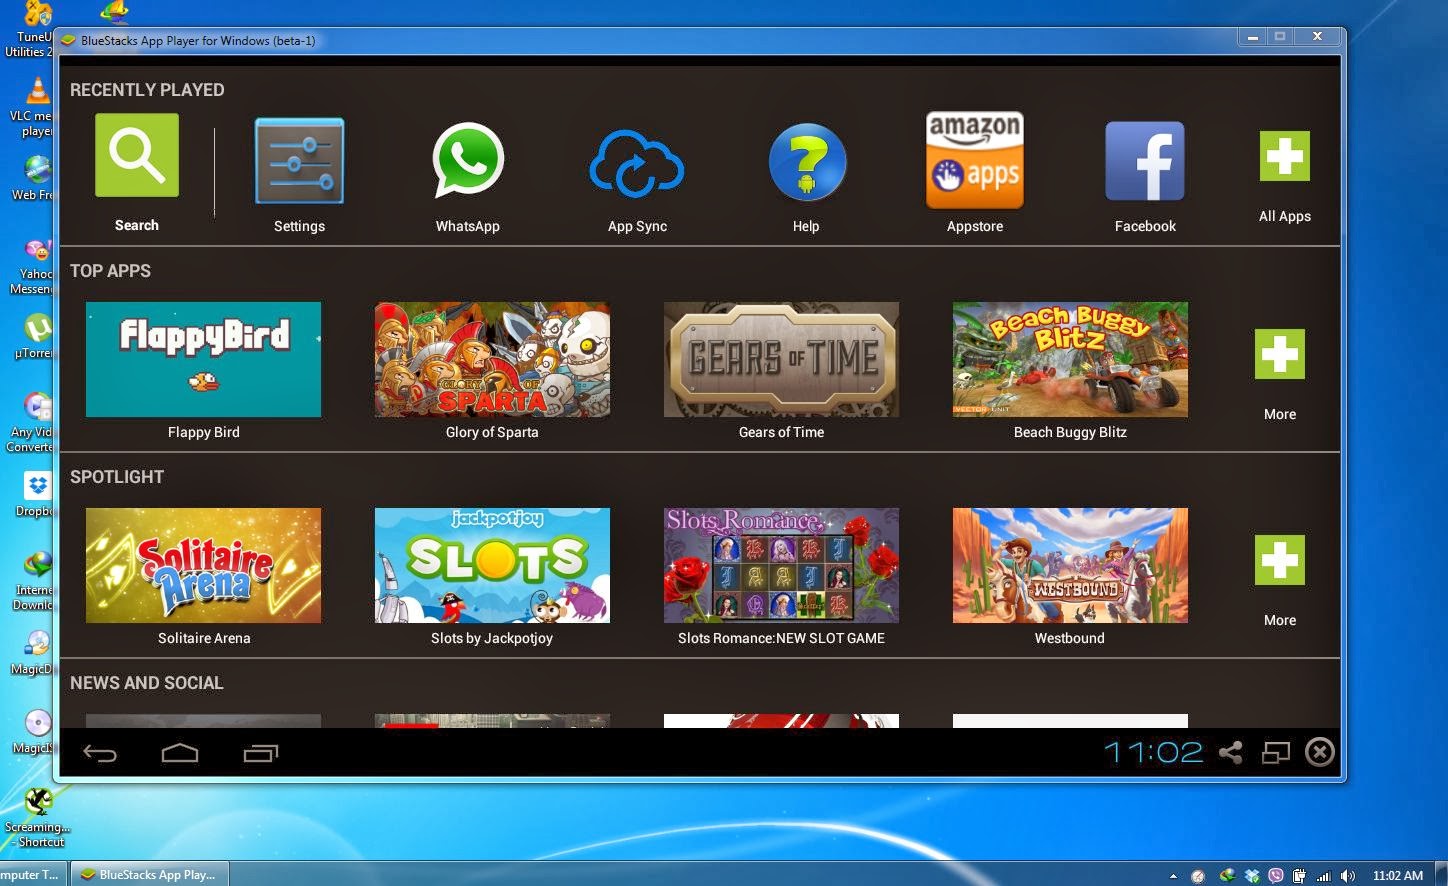 |
| Bluestacks Android Emulator |
- Select one of the many app stores and install the app.
- Go back to the home page and you should see the app listed there, you should be able to double click the app and run it.

Wednesday, February 11, 2015
Creating “HelloAndroid” project using android studio
To create a project in android studio please follow the following steps.
1. Run android studio

2. Create a new project

3. Choose options for basic settings

4. Choose activity type for default activity

5. Set name for default activity

6. System will create project now

7. Navigate to layout folder according to below image

8. Double click on activity_hellow_activity.xml file
9. Run application

10. System will display output

Tuesday, February 10, 2015
How to Make a Calculator App for Android
Hello everyone, in this tutorial we are going to learn how to make a calculator app for android (using Eclipse). Step by step process as well as a detailed video tutorial added in this article that will help you to make a simple calculator in very easy way. You can also download the apk file and use it as a normal app in your android phone.
Also Read: The Top 4 Websites to Create Android Apps Online for Free
Also Read: The Top 4 Websites to Create Android Apps Online for Free
Steps to Make a Calculator App for Android
1. First of all open eclipse (If your are new to android programming then go to http://developer.android.com/sdk/installing/installing-adt.html to download and configure android development tools).
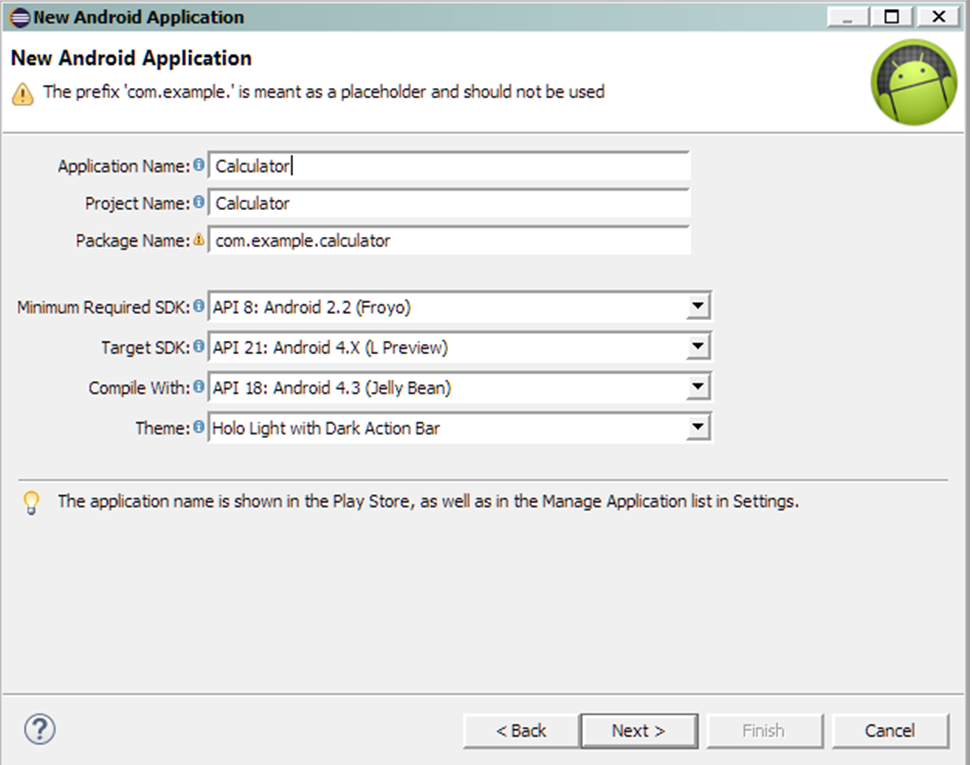
2. Create a new project > Select Android Application Project > Now name your project "Calc".

3. Choose a Package Name. A Package Name is a unique URL of your Application. In most cases it is the inverse of your website.
For example: com.thecrazyprogrammer.appname
4. If you want you can leave it to the default package name which is "com.example.calc". Now hit next two times.
5. If you have made an Icon then add it otherwise go with the default one. Select Blank Activity > Now name your activity "GUI".

6. From Palette option add total 16 buttons & name them from 0 to 9 and +, -, X, /, ., =.

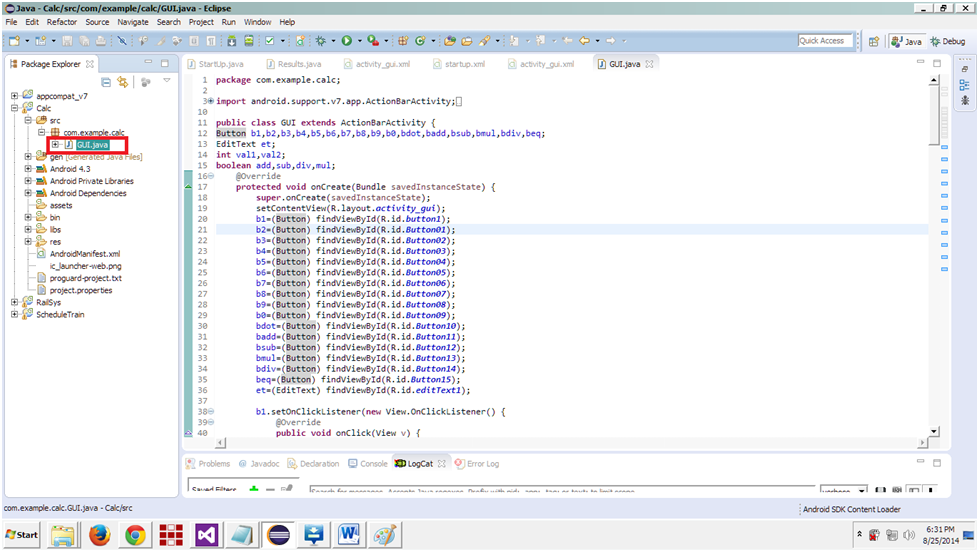
7. After completing this go to Package Explorer & under your Package Explorer Select src > Your package Name > yourActivityName.java
Also Read: C4droid: Download C/C++ Compiler for Android Platform for Free
8. Open the java file and paste the given code:
10. Download the calculator app for android from below link.
packagecom.example.calc;

import android.support.v7.app.ActionBarActivity;
importandroid.os.Bundle;
importandroid.view.Menu;
importandroid.view.MenuItem;
importandroid.view.View;
importandroid.widget.Button;
importandroid.widget.EditText;

public class GUI extends ActionBarActivity {
Button b1,b2,b3,b4,b5,b6,b7,b8,b9,b0,bdot,badd,bsub,bmul,bdiv,beq;
EditTextet;
int val1,val2;
booleanadd,sub,div,mul;
 @Override
 protected void onCreate(Bundle savedInstanceState) {
  super.onCreate(savedInstanceState);
  setContentView(R.layout.activity_gui);
  b1=(Button) findViewById(R.id.button1);
  b2=(Button) findViewById(R.id.Button01);
  b3=(Button) findViewById(R.id.Button02);
  b4=(Button) findViewById(R.id.Button03);
  b5=(Button) findViewById(R.id.Button04);
  b6=(Button) findViewById(R.id.Button05);
  b7=(Button) findViewById(R.id.Button06);
  b8=(Button) findViewById(R.id.Button07);
  b9=(Button) findViewById(R.id.Button08);
  b0=(Button) findViewById(R.id.Button09);
  bdot=(Button) findViewById(R.id.Button10);
  badd=(Button) findViewById(R.id.Button11);
  bsub=(Button) findViewById(R.id.Button12);
  bmul=(Button) findViewById(R.id.Button13);
  bdiv=(Button) findViewById(R.id.Button14);
  beq=(Button) findViewById(R.id.Button15);
  et=(EditText) findViewById(R.id.editText1);

  b1.setOnClickListener(new View.OnClickListener() {
   @Override
   public void onClick(View v) {
    // TODO Auto-generated method stub
    et.setText(et.getText()+"1");
   }
  });
  b2.setOnClickListener(new View.OnClickListener() {
   @Override
   public void onClick(View v) {
    // TODO Auto-generated method stub
    et.setText(et.getText()+"2");
   }
  });
  b3.setOnClickListener(new View.OnClickListener() {
   @Override
   public void onClick(View v) {
    // TODO Auto-generated method stub
    et.setText(et.getText()+"3");
   }
  });
  b4.setOnClickListener(new View.OnClickListener() {
   @Override
   public void onClick(View v) {
    // TODO Auto-generated method stub
    et.setText(et.getText()+"4");
   }
  });
  b5.setOnClickListener(new View.OnClickListener() {
   @Override
   public void onClick(View v) {
    // TODO Auto-generated method stub
    et.setText(et.getText()+"5");
   }
  });
  b6.setOnClickListener(new View.OnClickListener() {
   @Override
   public void onClick(View v) {
    // TODO Auto-generated method stub
    et.setText(et.getText()+"6");
   }
  });
  b7.setOnClickListener(new View.OnClickListener() {
   @Override
   public void onClick(View v) {
    // TODO Auto-generated method stub
    et.setText(et.getText()+"7");
   }
  });
  b8.setOnClickListener(new View.OnClickListener() {
   @Override
   public void onClick(View v) {
    // TODO Auto-generated method stub
    et.setText(et.getText()+"8");
   }
  });
  b9.setOnClickListener(new View.OnClickListener() {
   @Override
   public void onClick(View v) {
    // TODO Auto-generated method stub
    et.setText(et.getText()+"9");
   }
  });
  b0.setOnClickListener(new View.OnClickListener() {
   @Override
   public void onClick(View v) {
    // TODO Auto-generated method stub
    et.setText(et.getText()+"0");
   }
  });
  bdot.setOnClickListener(new View.OnClickListener() {
   @Override
   public void onClick(View v) {
    // TODO Auto-generated method stub
    et.setText(et.getText()+".");
   }
  });

 badd.setOnClickListener(new View.OnClickListener() {

  @Override
  public void onClick(View v) {
   val1=Integer.parseInt(et.getText()+"");
   add=true;
   et.setText(null);
  }
 });
bsub.setOnClickListener(new View.OnClickListener() {

  @Override
  public void onClick(View v) {
   val1=Integer.parseInt(et.getText()+"");
   sub=true;
   et.setText(null);
  }
 });
bdiv.setOnClickListener(new View.OnClickListener() {

 @Override
 public void onClick(View v) {
  val1=Integer.parseInt(et.getText()+"");
  div=true;
  et.setText(null);
 }
});
bmul.setOnClickListener(new View.OnClickListener() {

 @Override
 public void onClick(View v) {
  val1=Integer.parseInt(et.getText()+"");
  mul=true;
  et.setText(null);
 }
});

beq.setOnClickListener(new View.OnClickListener() {

 @Override
 public void onClick(View v) {
  val2=Integer.parseInt(et.getText()+"");
  if (add==true) {
   et.setText(val1+val2+"");
   add=false;
  }
  if (sub==true) {
   et.setText(val1-val2+"");
   sub=false;
  }
  if (mul==true) {
   et.setText(val1*val2+"");
   mul=false;
  }
  if (div==true) {
   et.setText(val1/val2+"");
   div=false;
  }
 }

});


 }

 @Override
 publicbooleanonCreateOptionsMenu(Menu menu) {
  // Inflate the menu; this adds items to the action bar if it is present.
  getMenuInflater().inflate(R.menu.gui, menu);
  return true;
 }

 @Override
 publicbooleanonOptionsItemSelected(MenuItem item) {
  // Handle action bar item clicks here. The action bar will
  // automatically handle clicks on the Home/Up button, so long
  // as you specify a parent activity in AndroidManifest.xml.
  int id = item.getItemId();
  if (id == R.id.action_settings) {
   return true;
  }
  returnsuper.onOptionsItemSelected(item);
 }
}
9. Right click on your project and select run as Android Application .
Now the emulator will pop up & you can test your project.

10. Download the calculator app for android from below link.
Calculator.apk
Thursday, February 5, 2015
ONYO PowerPad DUO 16GB Official Android Tablet Firmware
ONYO PowerpadDUO 16GB .(Applies to all model with serial number 2013).

Click here to download.
Note: applies to models with a serial number beginning with 2013.
Android beginner tutorial Part 59 Implicit Intents
Today well learn how to use implicit Intents and intent filters.
So far weve only used Explicit Intents and called Activities directly. Those always had a clear target - an Activity class to launch. Implicit Intents dont name a target.
An Explicit Intent is always delivered to its target, while Implicit ones need to pass a filter. Intent filters are elements of an applications manifest, which dictate which intents to receive and which ones to block.
An Intent Filter in the manifest file has fields that describe the action, data and category of the Activity. All these fields can be specified in the Implicit Intent and then compared with available filters. If the Intents action, data and category match with the filters of an Activity, that Activity is launched.
Today we will update our application from the previous tutorial and create a new application, which launches the first one using an implicit intent.
Firstly, go to the AndroidManifest.xml of the first application. View it as plain XML file and youll find this in the code:
We can add multiple filters for an activity. Lets create a new custom one, which also uses 2 fields - action and category. Set their values as shown:
The "com.kircode.codeforfood_test.LAUNCH_TEST" String is what we will later give to an Implicit Intent to search for a suitable Activity to launch.
The manifest xml looks like this:
Now create a new Application (File>New>Android Application Project). I called mine "CodeForFood Test Two". When youve created it, go to its layout xml and add a button:
In the java class of the new Activity, use this code:
As you can see, the code to create an Implicit Intent is simple. All we do is specify the action as the parameter of the constructor.
If you also want to filter by data, specify the data in the second parameter, or using the setData() method.
If you want to filter by category too, use addCategory() method of the intent.
Thats all for today!
We now have a second application, which launches the first application using an implicit intent.
Thanks for reading!
Read more »
So far weve only used Explicit Intents and called Activities directly. Those always had a clear target - an Activity class to launch. Implicit Intents dont name a target.
An Explicit Intent is always delivered to its target, while Implicit ones need to pass a filter. Intent filters are elements of an applications manifest, which dictate which intents to receive and which ones to block.
An Intent Filter in the manifest file has fields that describe the action, data and category of the Activity. All these fields can be specified in the Implicit Intent and then compared with available filters. If the Intents action, data and category match with the filters of an Activity, that Activity is launched.
Today we will update our application from the previous tutorial and create a new application, which launches the first one using an implicit intent.
Firstly, go to the AndroidManifest.xml of the first application. View it as plain XML file and youll find this in the code:
            <intent-filter>
                <action android:name="android.intent.action.MAIN" />
                <category android:name="android.intent.category.LAUNCHER" />
            </intent-filter>
We can add multiple filters for an activity. Lets create a new custom one, which also uses 2 fields - action and category. Set their values as shown:
        <activity
            android:name="com.kircode.codeforfood_test.MainActivity"
            android:label="@string/app_name" >
            <intent-filter>
                <action android:name="android.intent.action.MAIN" />
                <category android:name="android.intent.category.LAUNCHER" />
            </intent-filter>
            <intent-filter>
                <action android:name="com.kircode.codeforfood_test.LAUNCH_TEST" />
                <category android:name="android.intent.category.DEFAULT" />
            </intent-filter>
        </activity>
The "com.kircode.codeforfood_test.LAUNCH_TEST" String is what we will later give to an Implicit Intent to search for a suitable Activity to launch.
The manifest xml looks like this:
<?xml version="1.0" encoding="utf-8"?>
<manifest xmlns:android="http://schemas.android.com/apk/res/android"
    package="com.kircode.codeforfood_test"
    android:versionCode="1"
    android:versionName="1.0" >

    <uses-sdk
        android:minSdkVersion="8"
        android:targetSdkVersion="16" />
    <uses-permission android:name="android.permission.CALL_PHONE"/>
    <uses-permission android:name="android.permission.CAMERA"/>

    <application
        android:allowBackup="true"
        android:icon="@drawable/ic_launcher"
        android:label="@string/app_name"
        android:theme="@style/AppTheme" >
        <activity
            android:name="com.kircode.codeforfood_test.MainActivity"
            android:label="@string/app_name" >
            <intent-filter>
                <action android:name="android.intent.action.MAIN" />
                <category android:name="android.intent.category.LAUNCHER" />
            </intent-filter>
            <intent-filter>
                <action android:name="com.kircode.codeforfood_test.LAUNCH_TEST" />
                <category android:name="android.intent.category.DEFAULT" />
            </intent-filter>
        </activity>
        <activity android:name="com.kircode.codeforfood_test.SecondActivity"></activity>
    </application>

</manifest>
Now create a new Application (File>New>Android Application Project). I called mine "CodeForFood Test Two". When youve created it, go to its layout xml and add a button:
<LinearLayout xmlns:android="http://schemas.android.com/apk/res/android"
    xmlns:tools="http://schemas.android.com/tools"
    android:layout_width="match_parent"
    android:layout_height="match_parent"
    android:orientation="vertical"
    tools:context=".MainActivity" >

    <TextView android:layout_width="match_parent"
        android:layout_height="wrap_content"
        android:textSize="32sp"
        android:text="Second Application"
        />

    <Button android:id="@+id/launchButton"
        android:layout_width="match_parent"
        android:layout_height="wrap_content"
        android:text="Launch CodeForFood"
        />

</LinearLayout>
In the java class of the new Activity, use this code:
package com.example.codeforfoodtest_two;

import android.app.Activity;
import android.content.Intent;
import android.os.Bundle;
import android.view.View;
import android.widget.Button;

public class MainActivity extends Activity{


@Override
protected void onCreate(Bundle savedInstanceState) {
super.onCreate(savedInstanceState);
setContentView(R.layout.activity_main);

final Button btn = (Button)findViewById(R.id.launchButton);
btn.setOnClickListener(new View.OnClickListener() {

@Override
public void onClick(View v) {
Intent intent = new Intent("com.kircode.codeforfood_test.LAUNCH_TEST");
startActivity(intent);
}
});
}

}
As you can see, the code to create an Implicit Intent is simple. All we do is specify the action as the parameter of the constructor.
If you also want to filter by data, specify the data in the second parameter, or using the setData() method.
If you want to filter by category too, use addCategory() method of the intent.
Thats all for today!
We now have a second application, which launches the first application using an implicit intent.
Thanks for reading!
Wednesday, February 4, 2015
Allwinner A13 SAQ8 A13 V1 2 Android Tablet Firmware
Allwinner A13 SAQ8 A13-V1.2
Android tablet Firmware
Supported by Many Brands
i.e Vipad Q8 , Angel Nov
Board Id : SAQ8 A13-V1.2
What board ID , Tablet CPU Chip ,Firmware Number does my Tablet have ?
Know more about Allwinner Technology:-
Read Article About Allwinner Technology
Frequently Asked Question about Android Tablets
Learn How to Flash Allwinner Tablet
- Tablet Flashing Tool : Firmware upgrade tool LiveSuit & Drivers
- Alternate Tablet Flashing Tool: Firmware Flashing Tool Phoenix Suit
- LiveSuit Tutorial : how to flash tablet with LiveSuit
You can also use :
Android Multi ToolsWhen I need to Flash or Restore my Tablet Pc?
1. Forgotten Pattern Lock on Android Tablets. (If undone by Hard reset)
2.Too many pattern attempts / Reset user lock.(If undone by Hard reset)
3. Tablets PC stuck on Gmail account.
4. Android Tablet PC stuck on Android logo.
5.Unexpected error / Force close errors generate by Android operating system .
5.Unexpected error / Force close errors generate by Android operating system .
<
Download Tablet Firmware
Related Posts:
- Q8 V6.6 Allwinner Stock Rom
- Q8 V1.7 Allwinner Stock Rom
- Q8 V2.6 GSL1680 Allwinner Stock Rom
- Q8 mxc622x 20121101 Generic Rom
- Q8 atm7013 Allwinner Stock Rom
- Q8 V1.5 zhongxing Generic Rom
- Q8 a13 51324 Allwinner Stock Rom
- Q8 V12 Allwinner Stock Rom
- Q8 2127 V4 03090 20120918 Stock Rom
- Q8+ pengyang Stock Rom
Microsoft Office Mobile Finally Free for Android IOS users
Microsoft Office Mobile Finally Free for Android & Apple users.

 |
| Mobile Office |
 |
| Office for Mobile |
Access documents from virtually anywhere:
• Cloud – With your phone, you can access Office documents that are stored on OneDrive, OneDrive for Business, or SharePoint.
• Recent Documents – Office Mobile is cloud-connected. The documents you’ve recently viewed on your computer are readily available on your phone in the recent documents panel.
• Email Attachments – You can view and edit Office documents attached to email messages.* Office documents look stunning:
• Great-Looking Documents - Word, Excel and PowerPoint documents look great on your phone, thanks to support for charts, animations, SmartArt Graphics, and shapes.
• Optimized for phone - Word, Excel and PowerPoint have been optimized for the small screen of your phone.
• Resume Reading - When opening a Word document from OneDrive or OneDrive for Business on your phone, it automatically resumes at the place where you left off reading, even if you last viewed the document on your PC or tablet.
• Presentation Views - The Slide Navigator view in PowerPoint lets you browse slides faster, while speaker notes help you practice your presentation. Make quick edits and share*:
• Documents Remain Intact - Formatting and content remain intact when you edit Word, Excel, or PowerPoint documents on your phone.
• Create – You can create new Word and Excel documents on your phone.
• Comments - You can review comments that have been made in Word and Excel documents on your phone and add your own comments. * Sign in with a free Microsoft account to create, edit and save documents for home use. A qualifying Office 365 subscription is required to create, edit and save documents for business use. Qualifying plans include: Office 365 Small Business Premium, Office 365 Midsize Business, Office 365 Enterprise E3 and E4 (Enterprise and Government), Office 365 Education A3 and A4, and Office 365 ProPlus. Requires a phone running Android OS 4.0 or later.
Download
Subscribe to:
Posts (Atom)