Friday, March 13, 2015
Manymoon sees 30 higher conversions on Google Apps Marketplace
An Idea
We started Manymoon with the idea of bringing social communications to the workplace. Not because it was cool, but because we think the best way to get work done is with the help of the people around you while still minimizing interruptions.
Like most start-ups, we wanted to build something we’d use ourselves. As heavy Google Apps users, we immediately saw the benefit of integrating Manymoon with Google Apps for tracking tasks or projects.
We also knew that professionals have unique requirements:
- Utility - professionals are busy throughout the work day and get judged on productivity. Any app they use needs to provide tangible value with immediate gratification. And what’s more satisfying than completing a task or project?
- Security - they need the ability to control what’s shared and with whom.
This led us to create Manymoon: a social productivity tool. It allows you to leverage your professional network to get work done. That means doing things like tracking conversations, managing projects, completing tasks and sharing documents. That was the easy part, now we just had to build it and find customers.
Finding Customers
The market opportunity speaks for itself: Google Apps has over 30 million users spanning over 3 million businesses. It’s also a growing business since they’re signing up over 3,000 new businesses per day. We would be in good shape if we got a small fraction of this flow.
Most importantly, the Google Apps Marketplace brings qualified customers who are comfortable using the cloud to run their business. Google Apps customers understand the value of:
- Not having to install or maintain software
- Software that requires minimal training
- Self-service software (they don’t require significant amount of in-person sales or support).
How We Did It
As a start-up, one of our advantages is time to market. There are numerous features that would have normally taken us months to develop but we accelerated the process by leveraging a variety of Google APIs and products.
Google Docs
Attach a Google Doc to a task or project and Manymoon will automatically handle the sharing permissions. This is the feature that consistently receives the most “wow” comments from customers.
Google Calendar
Keep your calendar automatically updated with relevant tasks and project information. We saved months that would have been required to build features such as reminders, views and meeting requests.
OpenID & Google Universal Navigation
Business customers already trust Google with their data, and this significantly reduces the friction in activating users. And with Google Universal Navigation, new users can experience Manymoon immediately without even having to register. Using Single Sign-On means users can move seamlessly from Google Apps to Manymoon without needing to re-enter their credentials.
Google Contacts
Contact integration via Google Contact API makes it incredibly easy to assign a task to someone or invite them to a project. Just enter their name! No more remembering email addresses or having to import contacts.
Gadgets!
Our customers are Google Apps customers first and foremost and this makes it simple to use Manymoon in the environment they’re already used to. We support a Gmail Contextual Gadget so users can create tasks and projects without ever leaving their inbox. And a Google Sites/iGoogle gadget allows project data to be part of more complex wiki and portal pages that customers build. Ultimately, Google Gadgets significantly reduce the friction for users to create and track projects.
The Results
The results have been fantastic. Since the launch of the Google Apps Marketplace in March, we’ve been signing up as many as 1,000 new businesses per week ... and that’s with no sales or marketing people in our company. These customers are finding us on their own in the Google Apps Marketplace, adding the app and getting engaged with it.
Google Apps Marketplace customers upgrade to a premium edition of Manymoon at a 30% higher rate than non-Google Apps Marketplace customers. The best part, however, is that our monthly registrations increased by 150% since the launch of Google Apps Marketplace. And that’s where the Marketplace really excels, it provides large enough volumes to make the Freemium business model work.
We also closely monitor business sign-ups since their users activate over a period of time. If a business with 1,000 employees signs up to Manymoon, some fraction of those users will use Manymoon in the 1st day. But a larger fraction will use it in the first week and and an even larger in the first month.
What We’ve Learned
We think there are three ingredients that are important to sustaining a large number of business sign-ups from the Google Apps Marketplace:
1) Appeal to a broad audience - Google Apps customers comprise all types of industries and job functions. Manymoon is broad enough to apply to most of them, so we cast the widest net and try to appeal to as many as possible.
2) Integrate deeply - of course most all Google Apps customers use Gmail. But each customer has its own mix of Google Apps they use (e.g., Google Docs + Gmail, Google Sites + Gmail, etc). We built Manymoon to be flexible enough to accommodate any of these mixes.
3) Demonstrate immediate value - logging in using a Google Apps account is the price of admission (literally). To really engage customers, you have to very quickly demonstrate additional ways your app works with Google Apps. We do this during the registration process.
How To Get Started
Google provides open APIs with very good documentation that can be accessed here. They also have a simple and transparent process for listing your app. We were able to find everything we needed to build and integrate Manymoon with Google Apps.
Want to weigh in on this topic? Discuss on Buzz
Thursday, March 12, 2015
Domain user management with Apps Script
Managing the user accounts in a Google Apps domain can be a daunting task when you have hundreds or thousands of them and you have no tools to automate the process. The Google Apps Provisioning API allows developers to write user management applications in the programming language of their choice, but many system administrators prefer a script-based solution instead. The recently launched UserManager Apps Script service fills the gap, providing Google Apps domain administrators an easy way to automate tasks such as batch user creation or update.
With the new Apps Script service, creating a user will be as easy as writing a single line of code:
var user = UserManager.createUser("newuser", "John", "Smith", "mypassword"); The UserManager service also makes it easy to perform the same task on each account in the domain. The following sample shows how you can force all users to change their passwords at the next login:
var users = UserManager.getAllUsers();
for (var i in users) {
    users[i].setChangePasswordAtNextLogin(true);
}
Calls to the UserManager service can also be scheduled to run hourly or daily, or in response to certain events thanks to Apps Script Triggers.
Interested in what else you can do with the UserManager service? Please check the documentation and get in touch with us on the the forum for any questions about its usage or to share more info about your project with the community.
 | Claudio Cherubino profile | twitter | blog Claudio is a Developer Programs Engineer working on Google Apps APIs and the Google Apps Marketplace. Prior to Google, he worked as software developer, technology evangelist, community manager, consultant, technical translator and has contributed to many open-source projects, including MySQL, PHP, Wordpress, Songbird and Project Voldemort. |
Wednesday, March 11, 2015
More ways for apps to write to Drive
Today we’re introducing two new ways for apps to build even richer integrations with Drive: app data folders and custom properties.
In order to run smoothly, your app may depend on data it stores in Drive. But occasionally, users may accidentally move or delete the very file or folder your app needs to function. The app data folder is a special folder in Drive that can only be accessed by your app. The app folder’s content is hidden from the user and from other apps, making it ideal for storing configuration files, app state data, or any other files that the user should not modify.
Although users cannot see individual files in the app data folder, they are able to see how much app data your app is using and clear that data in the Manage Apps dialog.

Apps can also now add custom properties to any Drive file. The new properties collection gives your app the power to create searchable fields that are private to your app or shared across apps. For example, a classroom app could keep track of the grade for a document or a project management app could keep track of the current status of a document going through a review process.
To learn more check out the technical documentation for both app data folders and custom properties, and if you have questions don’t hesitate to post on StackOverflow.
 | Nicolas Garnier Google+ | Twitter Nicolas Garnier joined Google’s Developer Relations in 2008 and lives in Zurich. He is a Developer Advocate for Google Drive and Google Apps. Nicolas is also the lead engineer for the OAuth 2.0 Playground. |
Sheetcaster 3D in Apps Script
Editor’s note: This is a guest post by Thomas Coudray, Amaury de la Vieuville, and Ahmed Bougacha. Thomas, Amaury, and Ahmed attended the Google Apps Script Hackathon in Paris, and in this post they are sharing their creative use of Google Apps Script to render a 3D scene in a Google Spreadsheet. -- Jan Kleinert
Recently, we heard about the Google Apps Script Hackathon arriving in Paris, France. We did not know much about Apps Script - heck, even JavaScript! Perfect occasion to learn something. We spent most of the event hacking around with the ever-growing collection of Google APIs. As a tribute to the folks over at id Software, we settled on one of the most fun (however useless) ways to use it: rendering a 3D scene in a spreadsheet.

The rendering is done using a technique called ray-casting, made popular by the 90s id Software game Wolfenstein 3D. Ray-casting is a really brilliant and straightforward algorithm:
First, we render the background: color the upper (sky) and lower (floor) halves of the screen in different colors. We store the pixel colors in a matrix, the screen buffer:
screen = new Array(SIZE_Y);
for (var lin = 0; lin < SIZE_Y; lin++) {
  screen[lin] = new Array(SIZE_X);
  for (var col = 0; col < SIZE_X; col++) {
    screen[lin][col] = colorToString((lin < MID) ? UPPER_BG_COLOR
                                                 : LOWER_BG_COLOR);
  }
}
Note that we draw the screen only once the buffer is fully colored, to avoid the overhead of coloring cells individually.
Then for each column of the screen:
- Cast a ray
- Move along the ray until hitting a wall, calculate the distance to that wall
- Draw a column whose height is inversely proportional to that distance
The trick is in the drawing: the upper and lower halves of the screen are symmetrical in shape, and the only computed value is the display height of the wall. The screen really is just a fancy formatting for an integer array of columns.
The camera is represented using:
- Its (real-valued) x/y coordinates in the map plane
- Its angle relative to some predefined direction
We store these 3 values at the bottom of the sheet, to ensure persistence (else, each refresh would bring us back to the start location!).
function Camera() {
  this.x = CAMERA_X;
  this.y = CAMERA_Y;
  this.theta = CAMERA_THETA;

  this.saveToSheet = function(sheet) {
    // The player state has to be saved between each frame
    sheet.getRange(STORE_LIN, 1, 1, 1).setValue(this.x);
    sheet.getRange(STORE_LIN, 2, 1, 1).setValue(this.y);
    sheet.getRange(STORE_LIN, 3, 1, 1).setValue(this.theta);
  };

  this.readFromSheet = function(sheet) {
    this.x = sheet.getRange(STORE_LIN, 1, 1, 1).getValue();
    this.y = sheet.getRange(STORE_LIN, 2, 1, 1).getValue();
    this.theta = sheet.getRange(STORE_LIN, 3, 1, 1).getValue();
  };

  ...
}
The map is a logical matrix, thus limiting us to discrete boxes for walls: for every cell, there either is (1), or is not (0), a wall:
// starting 10x10 map
var S = 10;
var map =
  [
    [1, 1, 1, 1, 1, 1, 1, 1, 1, 1],
    [1, 0, 1, 0, 0, 0, 0, 0, 0, 1],
    [1, 0, 1, 0, 1, 0, 1, 1, 0, 1],
    [1, 0, 0, 0, 0, 0, 0, 0, 0, 1],
    [1, 1, 1, 0, 1, 1, 0, 1, 0, 1],
    [1, 0, 0, 0, 1, 0, 0, 1, 0, 1],
    [1, 0, 0, 0, 1, 0, 0, 1, 0, 1],
    [1, 0, 1, 1, 1, 1, 0, 1, 0, 1],
    [1, 0, 0, 0, 0, 0, 0, 0, 0, 1],
    [1, 1, 1, 1, 1, 1, 1, 1, 1, 1]
  ];

It is also possible to modify the map in real-time: write a character in the boxes you want to swap, then hit Refresh map.
Moving involves adding (or subtracting for backwards movements) to the xy coordinates, using basic trigonometry, but only after checking the validity of the move (i.e. that it will not collide with a wall):
function Camera() {
  ...

  this.move = function(distance) {
    // return whether valid move or not
    x = this.x + Math.cos(this.theta) * distance;
    y = this.y + Math.sin(this.theta) * distance;
    if (isValidPos(x, y)) {
      this.x = x;
      this.y = y;
      return true;
    }
    return false;
  };
}

function moveUp() {
  readMapFromSheet(sheet);     // Retrieve the map from the sheet
  var camera = new Camera();
  camera.readFromSheet(sheet); // Retrieve the camera state from the sheet
  camera.move(0.5);
  raycast(camera);
}
Turning left (respectively right) is even simpler, adding (respectively subtracting) small constants to the camera angle (mod 2 PI):
function Camera() {
  ...

  this.rotate = function(alpha) {
    this.theta = (this.theta + alpha + 2 * Math.PI) % (2 * Math.PI);
  };
}

function lookRight() {
  readMapFromSheet(sheet);
  var camera = new Camera();
  camera.readFromSheet(sheet);
  camera.rotate(-0.25);
  raycast(camera);
}
Actual actions (moving/turning) are shown in a menu:
spreadsheet = SpreadsheetApp.getActiveSpreadsheet();
  var subMenus = [
      {name:"Reset",functionName:"onOpen"},
      {name:"Refresh map",functionName:"refresh"},
      {name:"Move forward",functionName:"up"},
      {name:"Look left",functionName:"left"},
      {name:"Look right",functionName:"right"},
      {name:"Move backward",functionName:"down"},
      {name:"Turn around",functionName:"turn"},
  ];
  spreadsheet.addMenu("Sheetcaster", subMenus);
The ray is cast as follows:
- Its origin is the cameras 2D coordinates in the map plane
- Its direction is calculated off the cameras and the column index (the center column will have the exact same direction as the camera; the other columns directions depend on the field of view parameter)
/*
 * Given a value on the x axis (screen column),
 * return the ray that will be cast
 */
function getRay(camera, x) {
  var cos = Math.cos(camera.theta);
  var sin = Math.sin(camera.theta);

  // from -1 to 1: 0 being when x is the middle column
  var k = ((SIZE_X / 2) - x) / SIZE_X;

  return new Vector_(
    cos / 2 - k * sin * K_FOV,
    sin / 2 + k * cos * K_FOV
  );
}
Moving the ray is the most involved step:
- Calculate the distance to the next vertical and horizontal borders
- Move to the closest border
while (!hit) {
  // Next potential wall is on the x axis
  if (dist.x < dist.y) {
    // Distance from the camera, delta:
    /  Distance between each horizontal wall along the ray
    dist.x      += delta.x;
    // step.x is either 1 or -1, depending on the ray direction
    mapCoord.x  += step.x;
    hit = readMap_(mapCoord.x, mapCoord.y);
  } else { // Next potential wall is on the y axis
    dist.y     += delta.y;
    mapCoord.y += step.y;
    hit = readMap_(mapCoord.x, mapCoord.y);
  }
}
The height of the drawn column is nothing fancy: the further the wall, the smaller-looking the wall, hence the smaller the height of the column.
Again, nothing really complicated. However, the simplicity of this wall-height technique is the reason behind its major caveat: there is no clean way to look up or down: you can only turn left or right, and move forward or backward.
Displaying the rendered image is done using a spreadsheet. Each cell becomes a small square pixel, its color being the background color of the cell. We pass our scren buffer matrix to the handy setBackgroundColors:
sheet.getRange(1, 1, SIZE_Y, SIZE_X).setBackgroundColors(screen);
As you probably noticed, the low display density makes the sharp, jagged, edges really visible. Fear not, reader, for we also implemented anti-aliasing!
The anti-aliasing algorithm is even simpler:
- Accumulate the length of runs (successions of same-sized columns)
- Draw a gradient, from the background (wall and floor) to the wall, above (and below) the columns
When the runs are really small (< 5 columns), we attenuate the gradient intensity, as it would only add another pixel above (below) the column, thus rendering the antialiasing utterly useless.

Real-time was not an objective, the main problem being controlling the player/camera. Scripted movements should however be quite easy to implement with a fixed duration loop, restarting itself using an Apps Script recurrent time-driven trigger (a minute-long loop, repeated every minute). This is left as an exercise to the reader.
Please feel free to copy the script and walk around this Apps Script virtual world.
 | Thomas Coudray Thomas is interested in low level computing and application security. |
 | Amaury de la Vieuville Amaury is passionate about algorithmic problem-solving and software engineering. |
 | Ahmed Bougacha Ahmed is interested in kernels, compilers and theoretical computer science. |
Improving the Apps Marketplace Sign in experience
To help, we suggest that Marketplace vendors evaluate the Google Identity Toolkit (GITKit). The toolkit drastically improves the sign-in experience for Google Apps users, as well as for users of popular free webmail services such as Gmail, Yahoo! Mail, Hotmail, and AOL Mail.
The biggest improvement in the sign-in flow is that after a user has logged into your website once, their return experience will be as simple as seeing the account (or accounts) they have used with your site and clicking the one they want to use.
For example, the user Bonnie might use the sassyapp.com app for both her main job, as well as for a small business she runs with her husband Clyde. Whenever Bonnie or Clyde need to sign in to sassyapp.com, they simply click the account they want to use.

If the user does not see their account listed, then they go through a one-time flow to add the account which sends them to the screen below. A Google Apps user can either click the Gmail button or type their email address. For users who cannot login with an identity provider, they will be asked to either enter their password or create a new account after entering their email address.

This user experience is based on an industry technique called an account chooser. In fact, Google is in the process of replacing its own login box with an account chooser and you can opt-in to start using it on Google yourself.
The Google Identity Toolkit (GITkit) can be used by any website, but is particularly useful for Apps Marketplace vendors. The toolkit is an external REST-based API built on the exact same infrastructure that Google uses to be a relying party, and includes a JavaScript widget for the same account chooser experience that you can opt-in to use on Google.
For more information, refer to the GITkit and Apps Marketplace documentation.
 | Eric Sachs Eric is a Product Manager for Google Security and board member of The OpenID Foundation. He has more than 15 years of experience in the areas of user identity and security for hosted Web applications. During his five-plus years at Google, he has worked as a Product Manager for many services, including the Google Account login system, Google Apps for Your Domain, orkut.com social network, Google Health, Google Security, and Internal Systems. |
A One Two Punch for Getting Even More out of Google Apps APIs
FlashPanel, a leading enterprise-grade security and management application for Google Apps, makes use of many Google Apps APIs. Each API comes with its own set of rate-limiting quotas, network traffic behavior and response conditions. The challenge we face is to provide our customers with a stable, consistent experience despite these API behavior differences. Fortunately, Google has provided two simple, yet powerful tools to greatly increase our success rate and reliability.
Controlling Throttle Rates with Guava’s RateLimiter
Google Apps APIs operate with quota rates per second or per day. As such, the FlashPanel development team’s objective is to minimize total operation time of a parallelized set of API-intensive processes while avoiding running into Google’s API quota limits. To accomplish this, we can very easily set up a thread-safe RateLimiter for a specific rate per second for each rate restricted API:
final RateLimiter driveApiRateLimiter = RateLimiter.create(QUOTA_RATE_PER_SECOND);
The Guava RateLimiter allows us to attempt to acquire a permit based on the configured rate per second, block until available, and then take it when available, allowing execution.
To use it within the context of a method, we simply reference the rate limiter before making the API call:
public Result performDriveApiCall(driveApiRateLimiter, otherParams){
        driveApiRateLimiter.acquire(); // blocks according to rate
// make API call...}This provides us with a very easy solution for rate limiting parallelized calls to the same APIs.
Reducing Impact of Network Traffic Issues Through Configured Backoffs
Occasionally, we experience additional network traffic issues despite enforcing rate limits. Google suggests that API clients use an exponential backoff strategy to handle this variety of error response. Typically this category of network issue resolves itself on its own after fractions of a second, but occasionally more time is needed. All we need to do to receive a successful API response is to simply retry the call some number of times, with the interval of time between retries growing exponentially.
Again, Google has made this easy through the Google HTTP Client for Java library’s ExponentialBackOff builder. This class allows us to configure the initial retry time interval, the exponential multiplier, the maximum total time to attempt to retry, and the maximum total time between retries. For example, we could configure a retry to span five minutes, growing with a factor of two, starting at a one second interval, and growing up to a maximum of one minute between retries. An API call with this configuration would retry with the following pattern in terms of seconds between retries:
1, 2, 4, 8, 16, 32, 60, 60, 60
If after this last retry, the API call still was not successful, the failed http response is returned. The code to configure such a strategy using the ExponentialBackOff.Builder reads as follows:
ExponentialBackOff backoff = new ExponentialBackOff.Builder()
    .setInitialIntervalMillis(ONE_SECOND)
    .setMultiplier(2.0)
    .setMaxIntervalMillis(ONE_MINUTE)
    .setMaxElapsedTimeMillis(FIVE_MINUTES)
    .build();
One potential “gotcha” that we’ve seen is if we accidentally slam a particular API with many simultaneous API calls. In this event, not only would each of these API calls fail, but they would also schedule their retry strategy to occur simultaneously. All subsequent retries would end up firing simultaneously, causing the API calls to continue to fail due to excess per second volumes. The ExponentialBackoff class accounts for this by including a randomization factor within our retry logic that allows us to have each simultaneous API call stagger at different intervals.
For example, using our previous backoff but now with randomization, one API call may retry with these intervals:
1.04, 1.9, 4.23, 7.8, etc.
While a second API call would retry with something like these intervals:
.98, 2.04, 4.1, 8.15, etc.
With this randomization, we avoid API call sequencing collision, mitigating our chances of encountering quota related errors. To simply add this type of randomization, we append to our builder:
builder.setRandomizationFactor(RANDOMIZATION_FACTOR);
Once we have our exponential backoff strategy configured, the Google HTTP Client for Java library allows us to instantiate and assign an HttpBackOffUnsuccessfulResponseHandler to an HttpRequest as part of the request’s initialization:
private HttpBackOffUnsuccessfulResponseHandler handler = new HttpBackOffUnsuccessfulResponseHandler(backoff);

public void initialize(HttpRequest request){
    request.setUnsuccessfulResponseHandler(handler);
}
Final Thoughts
By restricting our API calls using Google Guava’s easy-to-use RateLimiter, and by employing an exponential backoff strategy using the Google HTTP Client for Java library’s ExponentialBackOff, we are able to significantly reduce the amount of network traffic errors received by our Google Apps API calls, improving FlashPanel’s reliability and the overall user experience.
Steve is Senior Architect at BetterCloud, the makers of FlashPanel, the number one security and management application for Google Apps. Follow BetterCloud on Google+ at plus.google.com/+Bettercloud.
Posted by Greg Knoke, Googler
Tuesday, March 10, 2015
Come Learn About Apps Script in Washington DC
Editors note: This has been cross-posted from the Google Code blog -- Jan Kleinert
Google Apps Script is a JavaScript cloud scripting language that provides easy ways to automate tasks across Google products and third party services. If you want to learn more about Google Apps Script, collaborate with other developers, and meet the Apps Script team, here’s your chance! We will be holding an Apps Script hackathon in Washington, DC on Wednesday, March 7 from 2pm - 8pm.
After we cover the basics of Apps Script, you can code along with us as we build a complete script, or you can bring your own ideas and get some help and guidance from the team. There will be food, power, and Apps Script experts available to help throughout the day. Just bring your laptop, ideas, enthusiasm, and basic knowledge of JavaScript. Check out out the details of the event and be sure to RSVP to let us know you’re coming.
 | Jan Kleinert profile | twitter Jan is a Developer Programs Engineer based in NYC, focusing on helping developers get the most out of Google Apps Script. Prior to Apps Script, she worked on Commerce, helping merchants integrate with Google Checkout and on Chrome, helping developers build great web apps. |
Visualize Your Data Charts in Google Apps Script!
Charts Ahoy!
Our initial launch includes six chart types. These can be attached to sites, sent as email attachments, or displayed using an Apps Script UiApp.


4 Easy Steps to Create Charts
Step 1 - Open Apps Script Editor
You can access the Apps Script Editor from a Spreadsheet or a Google Sites Page. To access the Apps Script Editor from a Spreadsheet, Open a New Spreadsheet > Tools > Script Editor. To open the Script Editor from a Google Sites, More > Manage Site > Apps Scripts > Add New Script.Step 2 - Create a Data Table
To build a chart, the first thing you need is a data table. The data table contains the data for the chart as well as labels for each category. In general, data tables contain one column of labels followed by one or more columns of data series, with some variations. Read the documentation for the type of chart you’re creating to learn the exact data table format it expects. Here’s an example of how you’d create a data table in Apps Script to use with a column chart:function doGet() {
// Populate the DataTable. Well have the data labels in
// the first column, "Quarter", and then add two data columns,
// for "Income" and "Expenses"
var dataTable = Charts.newDataTable()
.addColumn(Charts.ColumnType.STRING, "Quarter")
.addColumn(Charts.ColumnType.NUMBER, "Income")
.addColumn(Charts.ColumnType.NUMBER, "Expenses")
.addRow(["Q1", 50, 60])
.addRow(["Q2", 60, 55])
.addRow(["Q3", 70, 60])
.addRow(["Q4", 100, 50])
.build();In the example above, we’ve hard-coded the data. You can also populate the table in any of these ways:
- Fetch the data from an existing spreadsheet using
SpreadsheetApp - With data from a
UiAppform - Using our JDBC API
- Using
UrlFetch - Or any other way in which you can get an array of data using Apps Script.
Step 3 - Build a Chart using Data Table
Once you have the data table ready, you can start building the chart. Our top-level Charts class has Builders for each of the chart types we support. Each builder is configured for the specific chart you’re building, exposing only methods which are available for the specific chart type. For example, in a Line Chart you can make the angles smooth, in Bar and Column Charts you can stack up the data, and in Pie Charts you can make the whole chart 3D!Here’s an example of using the above data table to build a Column Chart:// Build the chart. Well make income green and expenses red
// for good presentation.
var chart = Charts.newColumnChart()
.setDataTable(dataTable)
.setColors(["green", "red"])
.setDimensions(600, 400)
.setXAxisTitle("Quarters")
.setYAxisTitle("$")
.setTitle("Income and Expenses per Quarter")
.build();
In the above chart, the only required methods are
setDataTable() and build(), all of the others are optional. If you don’t set colors and dimensions, for instance, we’ll pick some default values for you. Use the different setter methods to customize your chart, however and whenever you feel like it.Step 4 - Publish your chart in Documents, Email, Sites or UiApp
Once you’ve built your chart, there are different things you can do with it. For example, you can add it to an Apps Script UI. You can add a chart to any part of the UI that takes a widget, including the application itself. The following code snippet shows you how to publish a chart withUiApp.// Add our chart to the UI and return it so that we can publish
// this UI as a service and access it via a URL.
var ui = UiApp.createApplication();
ui.add(chart);
return ui;}
Charts can also be used as Blobs. This allows Charts to be attached to Sites pages, saved to your Docs List, or attached to outgoing emails. The code below does all three of these things:
// Save the chart to our Document List
var file = DocsList.createFile(chart);
file.rename("Income Chart");
file.addToFolder(DocsList.getFolder("Charts"));

// Attach the chart to the active sites page.
var page = SitesApp.getActivePage();
page.addHostedAttachment(chart, "Income Chart");

 // Attach the chart to an email.
MailApp.sendEmail(
    "recipient@example.com",
    "Income Chart",  // Subject
    "Heres the latest income chart", // Content
    {attachments: chart });
And that’s it. We hope you enjoy the new API. If your favorite chart is not here yet, or if you have ideas on how we could improve the API, please let us know in our forum. Finally, enjoy the income chart we’ve been building.

 | Gustavo Moura Gustavo has been a Software Engineer at Google since 2007. He has been part of the Google Docs team since 2009. Prior to that, he worked on AdWords. |
Want to weigh in on this topic? Discuss on Buzz
Monday, March 9, 2015
Control your Google Sites from Apps Script
// create a site, given the domain, site URL, site title and summary
var webpage = site.createWebPage("Jimmys Page", "JimmysPage", "Welcome to Jimmys site");
var annPage = site.createAnnouncementsPage("Team Announcements", "Announcements", "New announcements for the team will be posted here.");
site.createAnnouncement("Soccer Match #1", message, annPage);
Ryan Boyd
Building an Idea Bank using Google Apps Script
Editor’s Note: This is a guest post by Saqib Ali. Saqib is a Google Apps evangelist at Seagate. He has used Apps Script to create a number of applications that leverage Google Apps. His other interests include the curation of Lewis Carroll’s letter and translation of Urdu poetry to English. -- Ryan Boyd
What is an Idea Bank?
Idea Banks are repositories for innovative ideas that Seagate employees can submit, and others can vote on those ideas. Before Google Apps Script we had a custom built Idea Bank on the LAMP stack. With the release of the UI Services in the Google Apps Script, we wanted to port that Idea Bank to Google Apps to easily manage idea submissions in a Google Spreadsheet.
Designing the Idea Bank
A typical Idea Bank consists of three basic functions:
- Ability to submit and store ideas to a central database.
- Ability to vote on ideas.
- Ability to add description comment on ideas.
A traditional application would probably use a Relational Database like MySQL to store the ideas. However we found that using Google Spreadsheet to store the ideas provides two inherent benefits:
- Entered data can be easily managed using the Spreadsheet Editor;
- Revision history. Since Spreadsheet provides built-in revision history, we don’t have to create a system for tracking the changes to the submitted ideas.
The number of votes, and the voters are tracked using cells in the spreadsheet. For voters we used the Session.getUser().getEmail() to get the email address of the logged in user, and store them in the spreadsheet.
Since the Ideas Bank is embedded in a Google Site, we were able to simply use the Google Sites Page as a place holder to add description and comments to the ideas. Once the idea is submitted, a Google Sites page gets created corresponding to that idea from predefined template using the createPageFromTemplace() function. The submitter can then add detailed description in the template. Others can add comments to that Site pages.
Implementation Details
Using Spreadsheet Services to Manage Data
All the data is stored in a Google Spreadsheet, which makes it easy for the Idea Bank manager to manage (delete, remove, modify) the ideas using the Spreadsheets Editor.
Code snippet for adding new ideas to the spreadsheet:
var ss = SpreadsheetApp.openById("");  // Spreadsheet id goes here
SpreadsheetApp.setActiveSpreadsheet(ss);
ideas_sheet =  SpreadsheetApp.getActiveSpreadsheet().getSheetByName("Ideas");

var last_row = ideas_sheet.getLastRow();
var next_empty_row = last_row+1;

ideas_sheet.setActiveCell("A"+next_empty_row);
ideas_sheet.getActiveCell().setValue(e.parameter.ideadescription);
ideas_sheet.setActiveCell("B"+next_empty_row);
ideas_sheet.getActiveCell().setValue(Session.getActiveUser().getUserLoginId());
ideas_sheet.setActiveCell("E"+next_empty_row);
ideas_sheet.getActiveCell().setValue(Session.getActiveUser().getEmail());
Code snippet to read the ideas from the Spreadsheet and display them:
var ss = SpreadsheetApp.openById(""); // Spreadsheet id goes here
SpreadsheetApp.setActiveSpreadsheet(ss);
ideas_sheet =  SpreadsheetApp.getActiveSpreadsheet().getSheetByName("Ideas");

var last_row = ideas_sheet.getLastRow();
var last_column = ideas_sheet.getLastColumn();
var sheet_array = ideas_sheet.getRange(2, 1, last_row, last_column).getValues();

var submitIdeaButton = app.createButton("I have another idea");
var submitIdeaButtonHandler = app.createServerClickHandler(showSubmitIdeaDialog);
submitIdeaButton.addClickHandler(submitIdeaButtonHandler);
applyCSS(submitIdeaButton, _submitideabutton);

var ideaContents = app.createGrid().resize(last_row,3);
ideaContents.setId("ideacontents");
ideaContents.setWidth("100%");
ideaContents.setCellSpacing(0);
scrollPanel.add(ideaContents);
app.add(scrollPanel);

for (var row_i = 0; row_i < last_row-1; row_i++) {
  var ideaDescriptionLabel = app.createLabel(sheet_array[row_i][0]).setStyleAttribute("font","16px Sans-serif").setWordWrap(true);
  var submitter = sheet_array[row_i][1].split("@");
  var ideaAuthor = app.createLabel(submitter[0]).setStyleAttribute("font","10px Courier New, Courier, monospace").setStyleAttribute("color", "#CCC")
  ideaContents.setWidget(row_i, 0, app.createVerticalPanel().add(ideaDescriptionLabel).add(ideaAuthor)).setStyleAttribute("overflow","visible").setStyleAttribute("white-space","normal !important");

  //Button to display the voters
  var numberOfVotesForm = app.createFormPanel().setId(numofvotesform);
  var numberOfVotesFormContent = app.createVerticalPanel()
  numberOfVotesForm.add(numberOfVotesFormContent);
  numberOfVotesFormContent.add(app.createTextBox().setName(ideaID).setText(row_i + "").setVisible(false).setSize("0","0"));
  numberOfVotesFormContent.add(app.createTextBox().setName(voters).setText(sheet_array[row_i][4]).setVisible(false).setSize("0","0"));
  var numberOfVotesButton = app.createButton(countVotes(sheet_array[row_i][4]) + " vote(s)").setId("numberOfVotesButton"+row_i);
  applyCSS(numberOfVotesButton, _numofvotesbutton);
  var numberOfVotesButtonHandler = app.createServerClickHandler(showVotersDialog);
  numberOfVotesButtonHandler.addCallbackElement(numberOfVotesFormContent);
  numberOfVotesButton.addClickHandler(numberOfVotesButtonHandler);
  numberOfVotesFormContent.add(numberOfVotesButton);

  //Button to cast a vote
  var voteForm = app.createFormPanel().setId(voteform);
  var voteFormContent = app.createVerticalPanel();
  voteForm.add(voteFormContent);
  voteFormContent.add(app.createHidden(ideaID, row_i + "").setSize("0","0"))

  // Identify the function schedule as the server click handler
  var voteButton = app.createButton(I like this!).setId("voteButton"+row_i)
  var voteButtonHandler = app.createServerClickHandler(casteVote);
  voteButtonHandler.addCallbackElement(voteFormContent);
  voteButton.addClickHandler(voteButtonHandler);
  if (sheet_array[row_i][4].indexOf(Session.getActiveUser().getEmail())>-1)
    voteFormContent.add(voteButton.setText("Thanks!").setEnabled(false));
  else
    voteFormContent.add(voteButton);

  ideaContents.setWidget(row_i, 1, numberOfVotesForm);
  ideaContents.setWidget(row_i, 2, voteForm);
}
app.add(submitIdeaButton);
Using Ui Services to embed User Interface in Google Sites
Ui Service was used to build the front end for the app. UI Services are based on GWT, so it is a good idea to have a basic understanding of the GWT framework. The following were used in building this app:
- Horizontal panel to display each idea;
- Vertical panel to display the list of ideas;
- Simple button to cast votes and submit ideas;
- Form panel to accept new ideas.


A real live working example is available here. Full source code is available here.
But why Google Apps Script?
So why did I choose Google Apps Script? Well for one it is at no extra cost, comes with your Google Account, it is in the cloud (i.e. no servers required), integrates well with Google Sites and Spreadsheets, and most importantly it uses GWT UI widgets. Google Apps Script’s UI Services and the ability to easily integrate with any REST interface make Apps Script an easy choice.
 | Saqib Ali Saqib is a Google Apps evangelist at Seagate. He has used Apps Script to create a number of applications that leverage Google Apps. His other interests include the curation of Lewis Carroll’s letter and translation of Urdu poetry to English. |
Gmail and Document Services now available in Apps Script
GmailApp - read, label and send emails
 The new
 GmailApp should be instantly familiar if you’re used to using Gmail. You have access to labels, threads, and messages, and you can do all the things you expect: change labels, add and remove stars, mark things as important or trash or spam. You can also use the GmailApp.search() method to do any search you can do in Gmail itself. This is the first full fidelity API to Gmail, and we’re excited to see what you all will do with it.To make sure your Gmail account remains private and secure, we are extra cautious about any script that uses
GmailApp. Any time you change the code for a script that accesses Gmail, we will require you to reauthorize the script to run. Keep that in mind when editing a script that runs on a trigger - if you don’t reauthorize it, it will fail the next time the trigger tries to run it.DocumentApp - create and edit Docs
 The new
 DocumentApp lets you create new documents or open existing ones by id. The id of a document is always in the URL you see when visiting it, and document ids are consistent between DocumentApp and the existing DocsList service, so you can use DocsList.find() to search for a document, and then get its id from File.getId(). Once you have a document, you can access all of its individual elements. You can do search and replace (great for mail merge!), change styles or text, add or remove tables and lists, and much more. And when you are done, you can call
Document.saveAndClose(), which makes sure all of your changes to the document get saved. If you don’t call it, we’ll do it for you at the end of the script, but it can be useful to call it yourself if you’d like to do something with the document after making your edits.GmailApp and DocumentApp are available to all Apps Script users right now. Now the only question is, what are you going to build with them?Want to weigh in on this topic? Discuss on Buzz
SlideRocket completes Google Apps Marketplace integration in just a few days
We at SlideRocket were very excited to take part in the launch of the new Google Apps Marketplace. Weve always seen the value for our customers in providing integration with the Google platform—for example, in SlideRocket you could already load your Google contacts when inviting others to view your presentation, as well as link a table to a Google Docs spreadsheet. The new Google Apps Marketplace made it simple to leverage Googles existing set of extensive data APIs to take SlideRockets integration with Google to a new level for the millions of people already using Google Apps. The best part was that we were able to complete our initial integration for the Marketplace in only a few days thanks to the straightforward platform Google has built using various open standards.
The first and most pivotal step was setting up SlideRocket to work with Googles Federated Login using OpenID. Without the single sign-on capability of Federated Login, the rest of the integration wouldnt work. A key part of the login integration is making sure that Google Apps administrators have control over which of their Apps users have SlideRocket accounts. We accomplished this using the Google Provisioning API, which allowed us to make a small application for administrators to see a list of users in their domain, and check which ones should have SlideRocket accounts.
Fortunately, not only does Google Federated Login provide simple one-click login from Google Apps so that customers dont need a separate SlideRocket user name and password, but it also allows SlideRocket to utilize 2-Legged OAuth to integrate Google Apps users data into the SlideRocket workflow. This provides the best user experience, because once the Google Apps administration as added SlideRocket as an application, we no longer need to prompt the users for additional permission or confirmation—the integration is seamless from the users perspective.
Now that the users could easily sign in, it was time to integrate their contacts and Google Docs into SlideRocket. Our existing Google contact integration allowed users to login to their Google account using AuthSub and allow SlideRocket to access their contacts. We left this functionality in place for our existing customers, but for Google Apps users, we now utilize OAuth to automatically load their Google contacts—with no additional work for the user.
Similarly, we expanded our existing Google spreadsheet import functionality for Google Apps users, without having to change it for our existing customers. Existing SlideRocket customers can still paste a link to a published Google spreadsheet and have it imported into a table, but now Google Apps users in SlideRocket will see a list of all of the spreadsheets in their Google Docs account and can easily choose the source for their table. This was easily accomplished on our end using the Google Documents List API. We even expanded this functionality to allow all users—existing customers and Google Apps users—to import a Google spreadsheet directly as a chart or graph in SlideRocket.
We also leveraged the Google Documents List API to allow users to import their Google presentations into SlideRocket, so that they can spice them up a little with some animations, 3D transitions, video, and Flash content. Since the Documents List API provides all of this functionality, we were able to extensively reuse code for tables, charts, and presentations, thereby minimizing the resources required for our integration into the Google Apps Marketplace.
Finally, we are now beginning to use the Google Apps Licensing API so that we are able to view and monitor which Google Apps companies have added SlideRocket to their suite of apps. Although the licensing API is still in Labs, its provided us a great start towards keeping our Google Apps users properly integrated with our billing system.
It was amazing how quickly we were able to build such a compelling integration for Google Apps and weve just scratched the surface of all the possibilities the dozens of Google Data APIs can provide. The best part is that Google has wisely chosen to build upon existing standards like OpenID, OAuth, and AtomPub. This means that none of the resources we invested in learning these technologies and writing integration code is restricted to any one partner—we can reuse what weve gained with other standards-compliant partners in the future.
Author: Mitch Grasso is CTO at SlideRocket
XML changes in Apps Script
Many developers have come to prefer JSON for data serialization, but we recognize that good ol XML is still an important format for many Apps Script users. Our existing XML service is good at parsing XML, but has limited ability to create or alter existing documents. In order to provide a more complete and consistent experience, we have created a new XML service, which launches today. The new service is accessed using XmlService, in contrast to the old service which was simply called Xml.
Lets take a look at how you can use the new service to create an XML representation of the emails in your Gmail inbox.
function createXml() {
  var root = XmlService.createElement(threads);
  var threads = GmailApp.getInboxThreads();
  for (var i = 0; i < threads.length; i++) {
    var child = XmlService.createElement(thread)
        .setAttribute(messageCount, threads[i].getMessageCount())
        .setAttribute(isUnread, threads[i].isUnread())
        .setText(threads[i].getFirstMessageSubject());
    root.addContent(child);
  }
  var document = XmlService.createDocument(root);
  var xml = XmlService.getPrettyFormat().format(document);
  Logger.log(xml);
}
The code above logs XML that looks something like this:
<?xml version="1.0" encoding="UTF-8"?>
<threads>
  <thread messageCount="1" isUnread="true">
    Cant wait for the new XML service!
  </thread>
  <thread messageCount="1" isUnread="true">
    50% off all widgets through Friday
  </thread>
  <thread messageCount="3" isUnread="false">
    Dont forget about the picnic on Saturday
  </thread>
</threads>
The new XML service has some notable advantages over the old service:
- The ability to alter parsed XML content and save it back to a string.
- Access to all entity types in the XML document (
CDATA sections,Comments, etc.) - More control over the formatting of the XML string.
With the launch of this new service, we are deprecating some of our older XML tools in Apps Script, specifically the old XML service, the SOAP service, and the JavaScript feature E4X. Calls to these services will continue to work, but we encourage you to start migrating your code to the new XML service for better long-term support. On February 1, 2014, these old services will no longer appear in auto-complete or in our documentation, per the Apps Script sunset schedule.
Thursday, February 26, 2015
Run Android Apps on PC Free
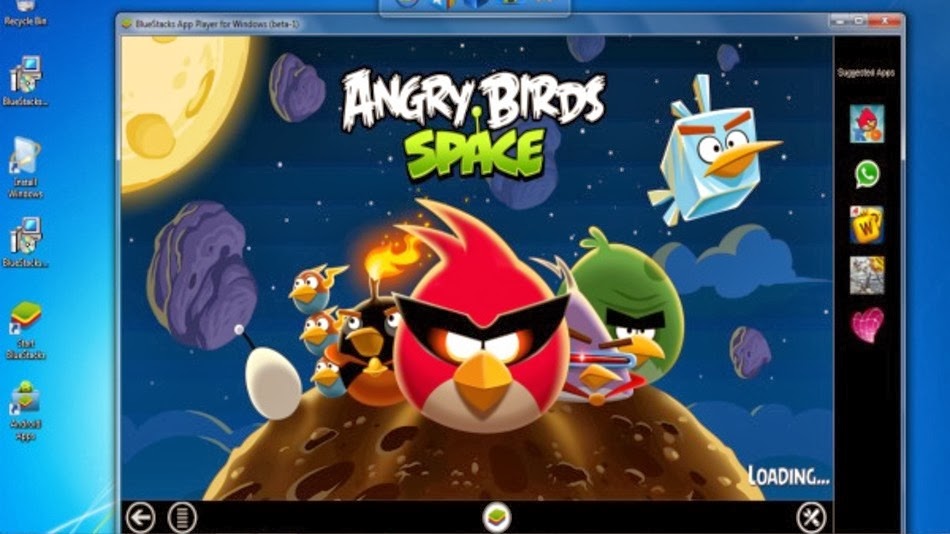 |
| Enjoy Android Apps on PC with Bluestack |
How to Run Android Apps on PC?
Now a days smart phones become basic need of a social human. There are very interesting stuff in smart phones like addictive apps and games. Specially Android platform provide a lot of apps and games that are very addictive. The first apps to go viral at an unprecedented pace were the apps with calling and texting, which are capable of reducing the burden on your wallet by helping you stay in touch with your dear ones. Such apps are rightly called “Over The Top” or OTT apps, some examples are We Chat, WhatsApp, Viber, Line, Rebtel etc. The important differences in these apps are that only a few of these apps help you make phone calls (Rebtel and Viber), the others are only text messaging based. So many people want to try Android Apps on their PC so i got this solution for them. Follow this easy tutorial and enjoy Android Apps on your Pc.
Steps to Get Android Games/Apps on your PC:
- First of All Download the Android Emulator from the link below.
- Click Here to Download Bluestacks.
- Youwave is a good emulator too, but it won’t work with ARM based apps.
- Install Bluestacks and run it. Note: You might run into graphics errors during installation,But still you can find out the solutions to almost most of the Bluestacks errors here.
- On the home page of Bluestacks, click on the search button and type in the name of the app or the game you want.
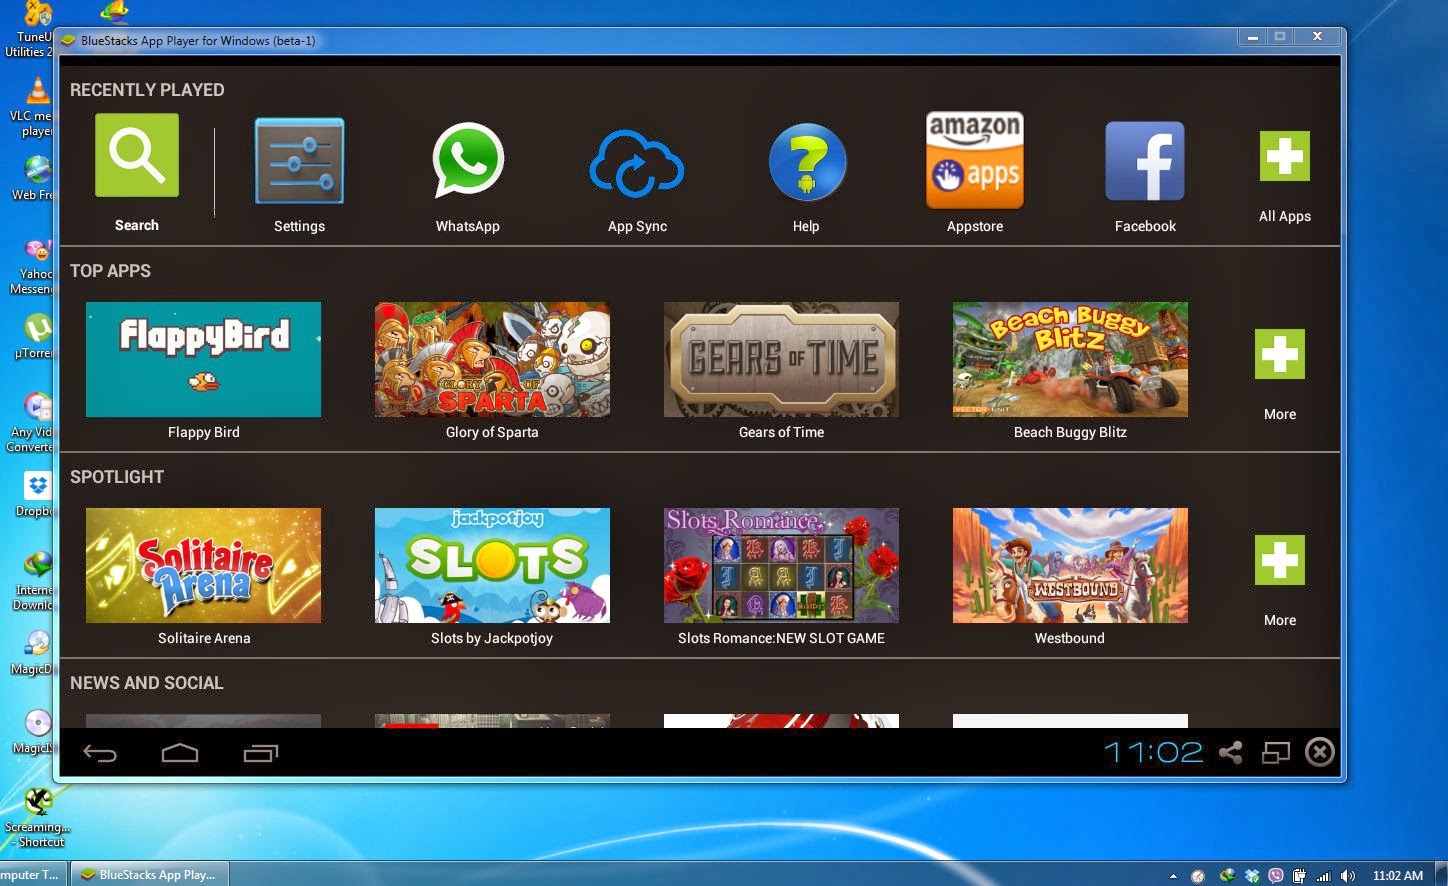 |
| Bluestacks Android Emulator |
- Select one of the many app stores and install the app.
- Go back to the home page and you should see the app listed there, you should be able to double click the app and run it.